There are some options that may need to be selected if you want to use the POS System to give the best service possible to your guests.
Some of these details will be Separate Meals, Degustation Menu and Shared Meals for example.
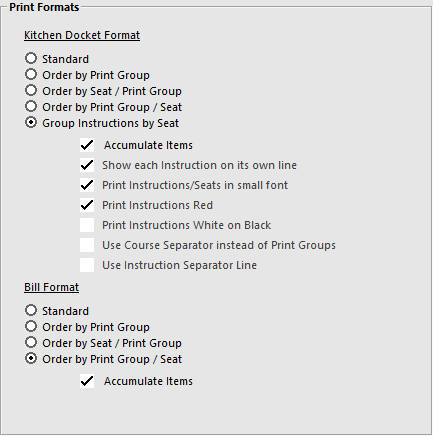
All of these options below are using the Group Instructions by Seat & Accumulate Items.
You can use both and they both behave in a similar way.
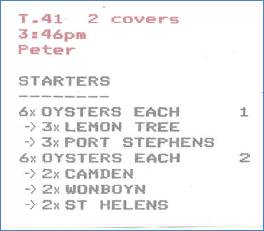
Use Instructions for the Oyster choices as this is required for the ‘KITCHENSEPARATE’ function.
You DON’T need instructions ticked for KP’s as they will print to the KP for the item it’s linked to.
Instructions item will show in the stock item sales report.
Instructions will put an arrow to the left of the description.
Instructions will be voided automatically when the item is voided.
Many menu items can be separated when being entered, but for some items that can have multiple choice selections, there may be a need to keep these items separate.
This function is able to be used for these items when all items are set to accumulate on the kitchen docket.
In our example below, we have used Oysters, with a selection of 5 different choices.
On the Oyster stock item, go to the Advanced tab > Sales Prompt > enter “KITCHENSEPARATE”.
When the docket is printed to the kitchen, the Oysters will have been separated by seat, allowing the chef to see which flavour oyster is to go to which customer.

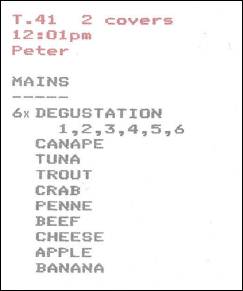
Idealpos can easily print degustation menu items to the kitchen in a manner that helps the chef see each course without it sending a large docket to the kitchen.
The Yes/No Option to “Print Stock Notes to Kitchen” must be selected for this to work.
The Stock Item that is the Degustation Course selection will need to have each course in the Notes field.
The kitchen docket will display each seat number at the top of the docket, and the chef can cross out each course as they are delivered.

It is common for many restaurants to offer meals that can be shared among guests at the same table.
When sending this detail to the kitchen, all staff will need to know to prepare both the cutlery and crockery.
When using this option, you may also need to use the NO SEAT function.
Create a new button called “SHARE” as a Text Entry Hash function with “SHARE ->” in the Automatic Text field.
When using this function, a Seat Number does not need to be selected before entering the item.
Select the item the guests want to share and press the SHARE button.
Enter the Seat Numbers using the Numerical Keypad and separate the numbers with the decimal point and press Enter.
The receipt to the kitchen will display as follows